本系列文章主要介绍Python的常用web框架django的使用,这里使用docker-compose来快速搭建开发环境。由于本人经验有限,文章难免有纰漏之处,还请海涵。
1.安装docker
1
2
3
4
5
6
7
8
9
10
11
12
|
sudo apt install apt-transport-https ca-certificates curl software-properties-common gnupg lsb-release
curl -fsSL https://download.docker.com/linux/ubuntu/gpg sudo gpg --dearmor -o /usr/share/keyrings/docker-archive-keyring.gpg
echo "deb [arch=$(dpkg --print-architecture) signed-by=/usr/share/keyrings/docker-archive-keyring.gpg] https://download.docker.com/linux/ubuntu $(lsb_release -cs) stable" sudo tee /etc/apt/sources.list.d/docker.list > /dev/null
sudo apt update
sudo apt install docker-ce docker-ce-cli containerd.io docker-compose-plugin
|
docker镜像源配置
配置镜像源以解决无法拉取镜像的网络问题,镜像源如果不能用了,请自行互联网搜索可用的镜像源。修改文件 /etc/docker/daemon.json(如果不存在则需要创建),添加如下内容:
1
2
3
4
5
6
7
8
9
10
| {
"registry-mirrors": [
"https://dockerproxy.com",
"https://docker.mirrors.ustc.edu.cn",
"https://docker.nju.edu.cn",
"https://docker.m.daocloud.io",
"https://dockerpull.com",
"https://atomhub.openatom.cn"
]
}
|
并重启服务:
1
2
3
4
5
6
7
8
| sudo systemctl daemon-reload && sudo systemctl restart docker
docker info
Registry Mirrors:
https://dockerproxy.com/
...
|
2.安装docker-compose
1
2
| curl -L "https://github.com/docker/compose/releases/download/v2.20.2/docker-compose-$(uname -s)-$(uname -m)" -o /usr/local/bin/docker-compose
chmod +x /usr/local/bin/docker-compose
|
3.项目文件结构
如下是本篇完成后的项目文件结构:
1
2
3
4
5
6
7
8
9
10
11
12
13
14
15
16
17
18
19
20
| .
├── docker-compose.yml
├── Dockerfile
├── .dockerignore
├── myproject
│ ├── manage.py
│ ├── myapp
│ │ ├── admin.py
│ │ ├── apps.py
│ │ ├── __init__.py
│ │ ├── models.py
│ │ ├── tests.py
│ │ └── views.py
│ └── myproject
│ ├── asgi.py
│ ├── __init__.py
│ ├── settings.py
│ ├── urls.py
│ └── wsgi.py
└── requirements.txt
|
4.创建工程
1
2
3
4
5
6
|
$ django-admin startproject myproject
$ cd myproject
$ python manage.py startapp myapp
|
4.1注册应用
1
2
3
4
5
6
7
8
9
10
11
12
13
14
15
16
17
18
|
INSTALLED_APPS = [
'django.contrib.admin',
'django.contrib.auth',
'django.contrib.contenttypes',
'django.contrib.sessions',
'django.contrib.messages',
'django.contrib.staticfiles',
'rest_framework',
'myapp',
]
LANGUAGE_CODE = 'zh-hans'
TIME_ZONE = 'Asia/Shanghai'
USE_TZ = False
|
5.docker-compose.yml
这里共起了3个服务,分别是web、mysql、redis,将mysql和redis的数据挂载到了宿主机,服务之间通过新建的桥接网络通信。
1
2
3
4
5
6
7
8
9
10
11
12
13
14
15
16
17
18
19
20
21
22
23
24
25
26
27
28
29
30
31
32
33
34
35
36
37
38
39
40
41
42
43
44
45
46
| version: '2'
networks:
backend:
driver: bridge
services:
web:
build: .
privileged: true
ports:
- "5000:5000"
networks:
- backend
depends_on:
- mysql
- redis
redis:
image: redis:5.0
environment:
- TZ=Asia/Shanghai
privileged: true
volumes:
- ./data/redis:/data
ports:
- "6379:6379"
networks:
- backend
restart: always
mysql:
image: mysql:5.7
environment:
- TZ=Asia/Shanghai
- MYSQL_USER=admin
- MYSQL_PASSWORD=admin
- MYSQL_ROOT_PASSWORD=root
privileged: true
volumes:
- ./data/mysql:/var/lib/mysql
ports:
- "3306:3306"
networks:
- backend
restart: always
|
6.Dockerfile
这里是web服务的Dockerfile,首先设置了pip源,然后拷贝requirements.txt安装依赖包,最后拷贝项目文件并启动django自带的服务。
1
2
3
4
5
6
7
8
9
10
11
12
| FROM python:3.8-alpine
RUN pip config set global.index-url http://mirrors.aliyun.com/pypi/simple
RUN pip config set install.trusted-host mirrors.aliyun.com
WORKDIR /code
COPY requirements.txt /code/requirements.txt
RUN pip install -r requirements.txt
ADD . /code
WORKDIR /code/myproject
CMD ["python", "manage.py", "runserver", "0.0.0.0:5000"]
|
7.requirements.txt
1
2
3
4
5
6
7
8
| django==3.2
djangorestframework==3.14.0
djangorestframework-jwt==1.11.0
djangorestframework-simplejwt==5.2.2
pymysql==1.1.0
django-redis==5.4.0
gunicorn==21.2.0
gevent==23.9.1
|
8..dockerignore文件
构建镜像时忽略以下文件或文件夹:
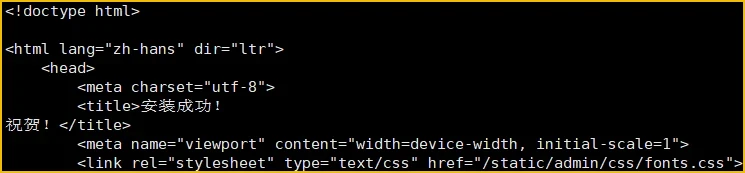
9.环境测试
使用docker-compose启动项目后,访问127.0.0.1:5000,出现如下提示说明环境搭建成功。
1
2
3
4
5
|
docker-compose up --build -d
curl 127.0.0.1:5000
|